
Google Data Studio is a great and free tool to create interactive dashboards and beautiful reports that fit your business intelligence needs – no code or database knowledge required. With the new Bitmovin Analytics Data Studio Connector it’s a breeze to bring your video analytics data to Google Data Studio, even without having a background as a software developer.
What is Google Data Studio?
Google Data Studio allows you to visualize your data through highly configurable charts and tables. The simple drag and drop report editor allows you to easily add charts and build reports without needing any deep technical knowledge. You can easily connect a variety of different data sources in one single report – for example, databases, Google Sheets, flat files or Bitmovin Analytics. The ability to pull all your data into one custom report that’s tailored to your company and business needs will make keeping an eye on multiple dashboards and reports a thing of the past. Sharing and collaboration are also built-in – Data Studio reports are stored as files on Google Drive, so it’s as easy to share your work with individuals, teams, or the world as in other Google collaboration tools like Google Sheets.
Connect Google Data Studio to Bitmovin Analytics
This guide will show you how to set up Bitmovin Analytics as a data source in Google Data Studio and create your own beautiful reports. The examples below certainly don’t cover all use-cases, but they should give you a good idea of what’s possible with the new connector and how it can transform the way you look and report on the data about your video infrastructure. Don’t have a Bitmovin Analytics account? Create a free account today.

Initial Data Source Configuration
To get started the first time you want to use our Google Analytics Data-Source you need to authorize it inside Google Data Studio. To do so follow this direct link: Bitmovin Analytics Data Source and click the “Authorize” button and follow the instructions on the screen.
To start, open Google Data Studio and create a new report. There will be a panel on the right side that asks you to select a data source. A click on “Create new data source” on the right bottom will bring you to an overview of all available Data Connectors. Use the Search field to search for the Bitmovin Analytics connector.
On the next screen, you’ll be asked to enter parameters that are necessary to access the API. The API key, license key, aggregation, and dimension are required fields (filter, limit and offset are optional). If you choose percentile as an aggregation, the percentile field is also required. Limit and offset are useful if you expect to receive a lot of rows from the API and want to incorporate pagination to fetch the data.
To start with, we’ll replicate the Total Impressions metric, which you can already find in the Bitmovin dashboard. Enter your API key, the key of your Analytics license, and choose Count as aggregation. We’ll use the IMPRESSION_ID as the dimension and the filter should be set to:
{"name":"VIDEO_STARTUPTIME","operator":"GT","value":0}
Keep the fields for percentile, limit, and offset blank. This metric will give us a measure of our audience that started a video playback session.
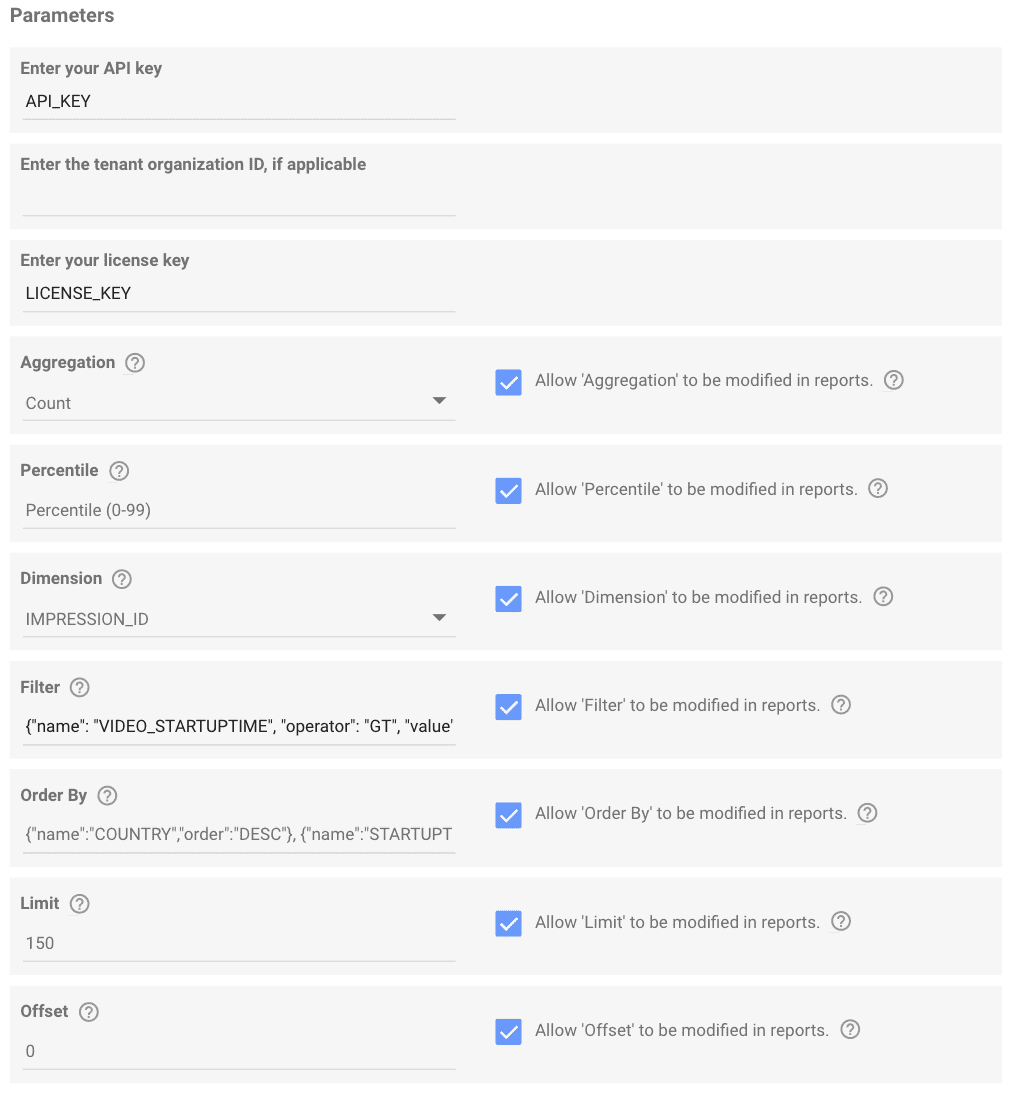
Especially in the beginning, it makes sense to tick all the checkboxes next to the fields, as this will allow us to modify the values directly in the report designer – otherwise, you’ll have to create a new data source each time you want to update one of the fields.
Click the Connect button in the top right corner and confirm that you’ll allow parameter sharing if you have ticked one of the checkboxes before. The next screen will give you a list of all available fields, you don’t have to do anything here – continue by clicking Add to report in the top right.
Visualizing your Video Impressions
You’ll now see an empty page in the report editor and you can add charts, tables, and layout controls to it. To visualize the trend of your impressions over time, we’ll add a line chart. Click on the Add a chart dropdown in the toolbar and choose the Time series chart.
The report designer will automatically choose a suitable field for the time dimension – per default this will be Day, but you can change the interval by dropping any other time dimension from the list on the right onto the Time Dimension field (you can easily identify all possible fields by the calendar icon in front of it – the connector will automatically adjust the query that will be sent to the Bitmovin Analytics API). The value that you’ve specified as a parameter in the previous screen will always be stored in the field called Dimension. Per default, the queried date range will be Last 28 days, you can also change this value in the settings pane.

In addition, you can also drag a column on the Breakdown Dimension field to get a more detailed view of your data or add a comparison date range to compare your data to another period. If you have allowed parameter overriding during the setup of your data source, you can also edit those fields in the settings pane. If you change to the Style tab, there are different options to format the axis, add labels or change colors of your chart.
Other Sample Reports for Google Data Studio
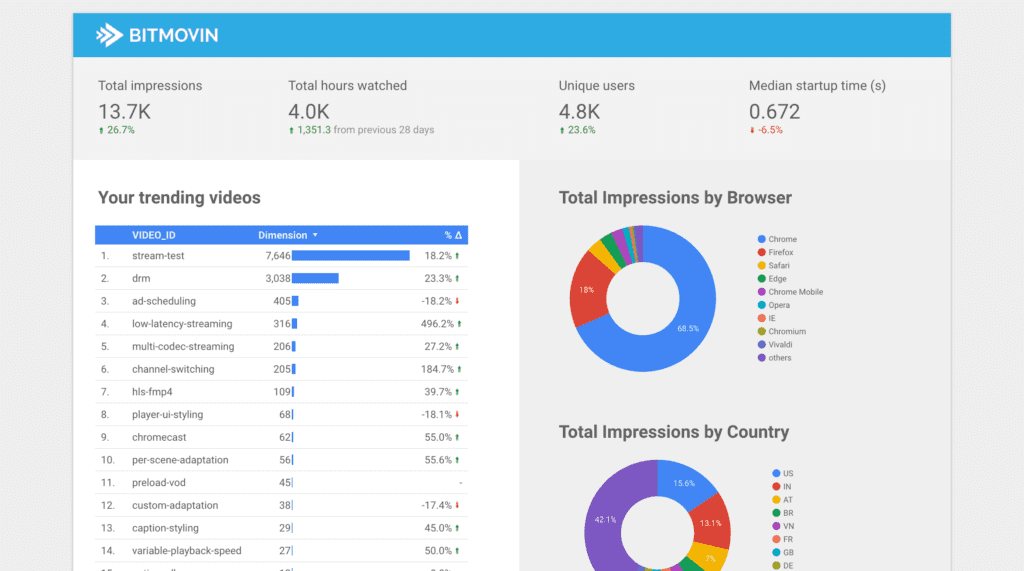
There are a lot of different options to visualize your data using Google Data Studio. Scorecards, for example, can be used to display a single value, which is optionally compared to another period. Each control has different styling options – you can switch between absolute or relative numbers for the comparison for example. Instead of visualizing data in charts, you can also place tables on the report and add columns and values using drag and drop.
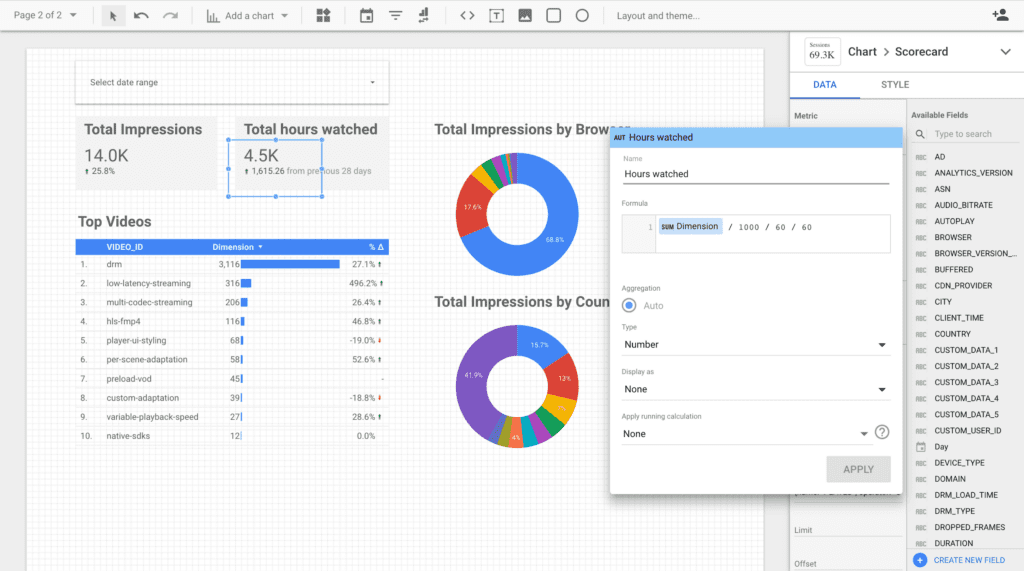
Another great feature is the possibility to create your own fields, which is really useful if you want to calculate something. If you click on the metric field, a link labeled Create field will appear. This will open a dialog that accepts a formula as input. Use the field Dimension to access the actual values returned by the Bitmovin Analytics API – in the example above we receive the total playing time in milliseconds and convert it into hours.
If you want to allow the viewers of your report to choose their own date ranges, place the Date range control anywhere on your report. All the charts and tables will be updated according to the values automatically then.