


On a mission to slim down Docker images
As an engineer, one thing that you should know when working with Docker images is that they can result in large files/folders. Docker has an established set of best practices that you can apply to reduce the size of your images. However, there are still some additional steps that you can take to further reduce the size of them. Using lightweight Docker images has many advantages over larger ones; ranging from bandwidth and storage decreases to performance and security improvements. Unfortunately, optimizing size without compromising functionality is much easier said than done. Today, we’ll review the steps necessary to achieve this goal.
How to reduce docker image sizes
The first step is to follow Docker’s best practices, most importantly, only include what you will need to run your application in your image. Multi-stage builds will help keep dependencies only needed during the build stage out of the final image. In many cases, switching to a smaller base image, like Alpine, will reduce the overall image size dramatically. However, depending on your application’s needs it might be necessary to install additional dependencies so everything will work as expected. The higher complexity that your Dockerfile is and the more dependencies that you add, the harder it can get to distinguish between what your image contains and what’s essential for your application to work properly.
Therefore, the most logical step is to review the contents of your images to find out which dependencies take up the most space. A nice tool that’ll help simplify this task is Dive, a UI based analysis tool that lists all of the files in a Docker container, and the layer they belong to. Given that manually scrolling through thousands of files is still too much labour, we built a tool that extracts the file paths, sizes, and the layer for any Docker image. However, before we jump into details about this tool, we’ll take a look at Docker images internals first.
How do Docker images work?
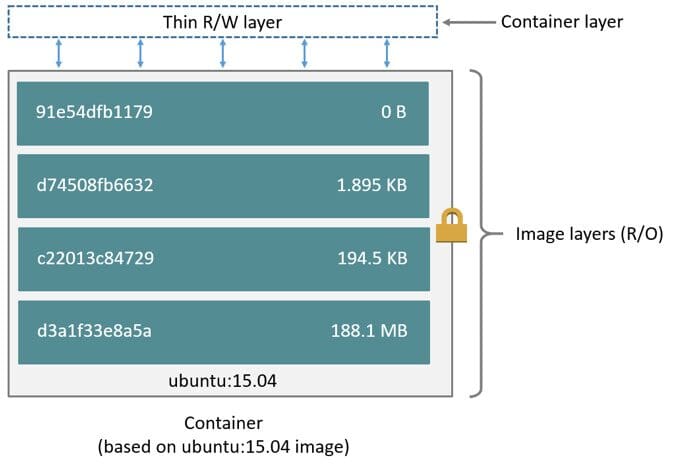
Docker uses a Union Mount File system to efficiently store images. The Union Mount File allows you to merge multiple File Systems into one. In Docker, a layer translates roughly into a single file system. There are various Union Mount File systems available, for example, ‘auf’ and ‘overlay’ each with their own advantages and disadvantages.
The diagram below indicates a typical layout of an image. The various layers are mounted on top of each other and are read-only. The topmost thin read/write layer collects any changes made to the running image.
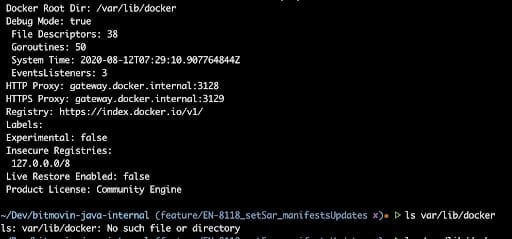
But where are these layers located on your machine? The docker info command, answers this question. Among many other things, it shows which storage driver your system uses and where the files are located.

Before the release of Docker v1.10 finding the contents of layers on disk would have been easy because the directory names corresponded directly to the ones that the docker history command returned. That means for our use case it would have been enough to parse the output of the history command and run an ls for each layer. Unfortunately, we are no longer on v1.09.
What changed after Docker v1.10
The original and somewhat simple method had its own set of problems, the biggest one being that it was impossible to detect if an image’s contents had been tampered with. Therefore, with v1.10, a digest derived from the content was added to identify layers. This digest changes if and when the layer content is modified, making it possible to detect any changes.
Another update added in v1.10 is that layers can now be shared between images that are built on different machines, further increasing storage efficiency. However, a consequence of the updates is that directory names are now disconnected from the image ID displayed by the docker history command. Making our analysis (and potential implementation) much harder.
For additional information about Docker images please view the following blog post: Explaining Docker Image IDs
Modern problems require modern solutions
Docker maintains manifest files for each image so it’ll know which directories need to be mounted in which order to get the desired image. With these handy files, we can connect the content of a directory to a layer. However, to directly access the root dir would be terribly inconvenient, because we would need to implement special handling for the various Union Mount Systems. Fortunately, a Docker command exists that does all of the heavy lifting for you.
> docker save <image_id>
This command will generate a tar file that contains all of the layers of an image and two manifest files that carry all of the information necessary to connect the various directories to their respective layers.
Tar Files
The first manifest file, manifest.json, contains the location of the various layers and the name of the other manifest file (<Image_id>.json).

The second file carries additional information like the architecture, the entrypoint, the layers included, and whether it’s an empty_layer or not.
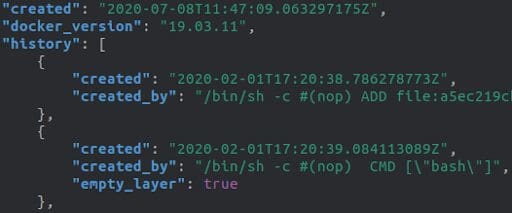
If we ignore empty layers in the <Image_id>.json file, both files will show the same number of layers. We can then join them by iterating over the <Image_id>.json file and selecting the created_by field, while concurrently iterating over the manifest.json to pick the location of the layer. This method combines the content of a layer with the command that created it.
You can find the Python script we created that performs all of these steps and generates a CSV with all of the collected data here.
Summary
We explained why it’s important to reduce the image size of your applications and showed which best practices exist. The CSV file created by our tool allows you to filter and sort the contents of your images easily and will (hopefully) find the excessive dependencies in your workflow and can be safely removed.